12oz (about 2 ½ cups) of raw sesame seeds
1-2 tablespoons olive oil
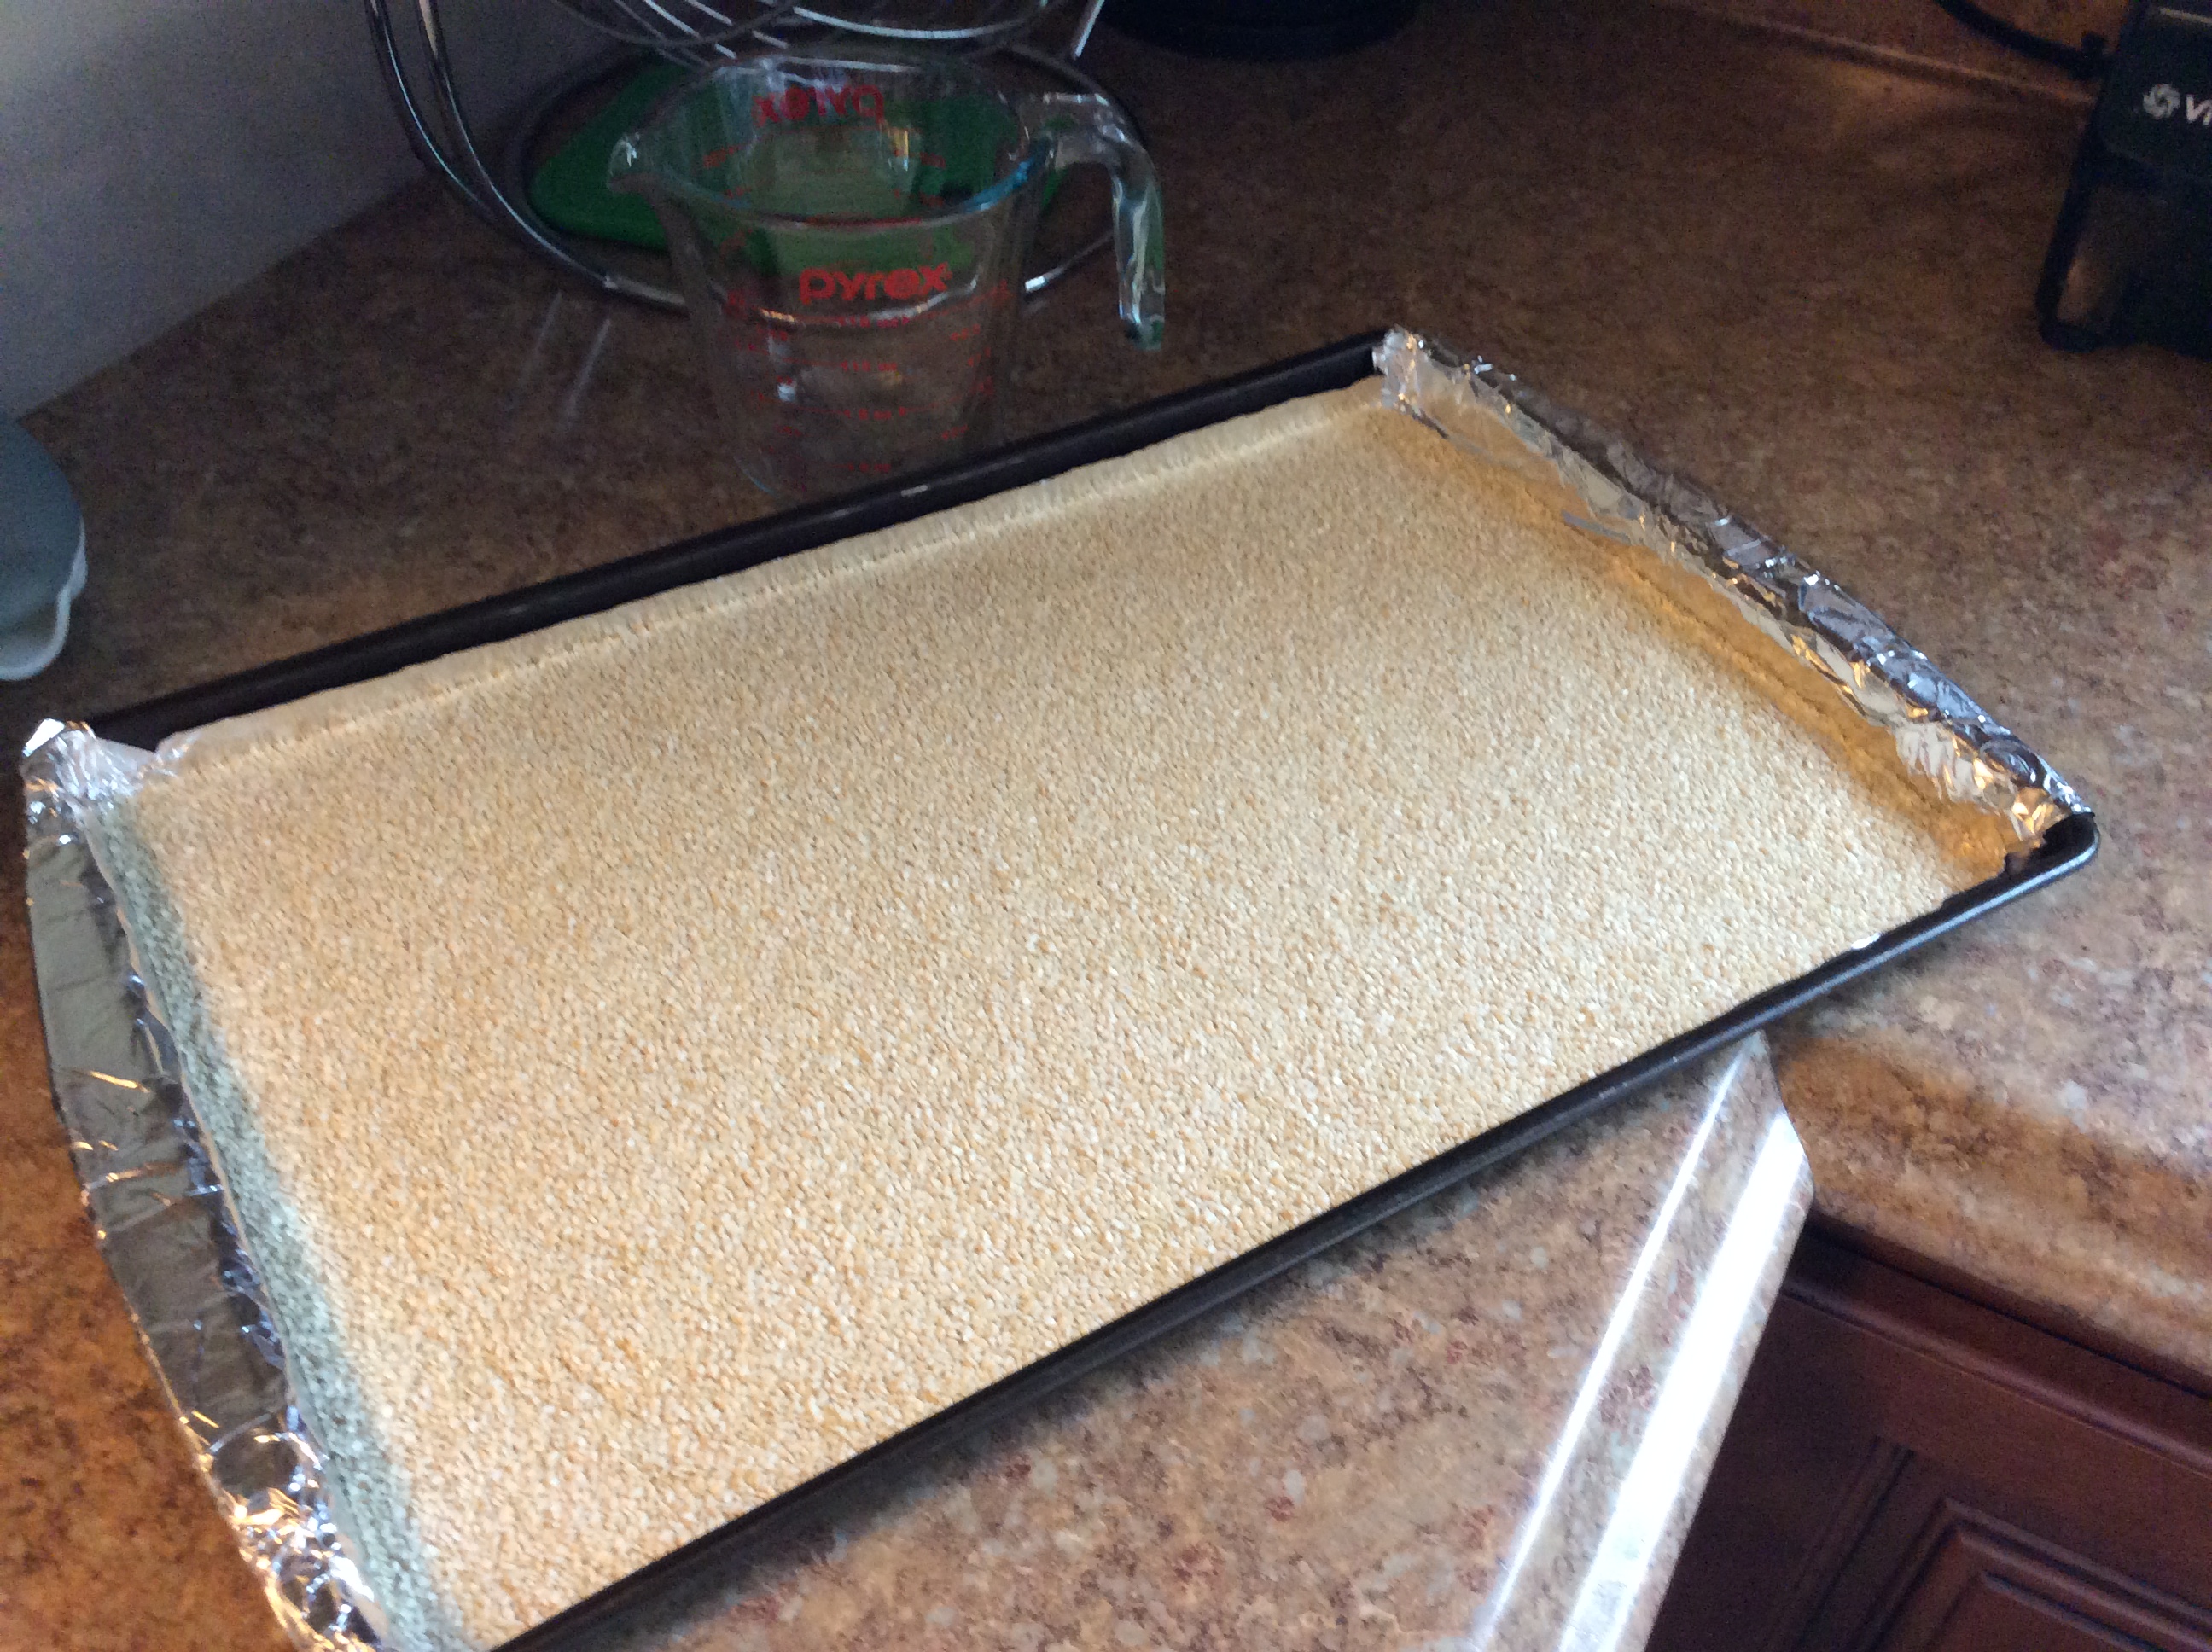
Toasted sesame seeds: Preheat oven to 350 degrees. Place sesame seeds on a cookie sheet and bake for 5-10 minutes stirring often. Cool for 15 minutes.
1. Place sesame seeds into the Vitamix container and secure lid.
2. Select variable 1.
3. T urn machine on and quickly increase speed to Variable10, then high.
4. Blend for 1 minute using the tamper to press the mixture into the blades.
5. Remove the lid plug and add olive oil 1 tablespoon at a time until the mixture is smooth and has the consistency of a thick liquid.
Food Tip: Be sure not to overcook the seeds because the tahini will taste burnt. They will not be brown when they are done. You will barely see a color change.
Time Tip: Use foil on your cookie sheet. Once the seeds are cooled you can lift the sides of the foil and form a tube. Lift the foil and pour directly into the Vitamix container. I have tried pouring the seeds into the container directly from the cookie sheet only to have lots of them all over my counter. Using a spoon takes a long time because the seeds are so small and smooth.
Money Tip: Sesame seeds bought in bulk costs about $1/lb. One 16oz jar of tahini can cost anywhere from $6 to $12!
1. Select Variable 2.
2. Turn machine on, remove the lid plug and slowly pour the olive through the lid.
3. Blend 3-5 seconds or until all of the olives are evenly chopped.
Food tip: You can adjust the variable speed up or down 1 speed at a time to get the desired texture. This technique also works well for chopping whole Jalapeno peppers. Split them lengthwise and remove the seeds by scraping them off with a spoon then cut the peppers in thirds before dropping them through the lid.
Time Tip: Chopping a whole can of olives by hand can take up to 10 minutes (I know. I’ve done it). Using the Vitamix it takes about 10 seconds and that’s counting opening and draining the olives!
Money Tip: When I’m chopping large quantities for my Nine Layer Bean Dip (you’ll find the recipe in the dip category here in my blog), I buy a 33oz bag of sliced olives.
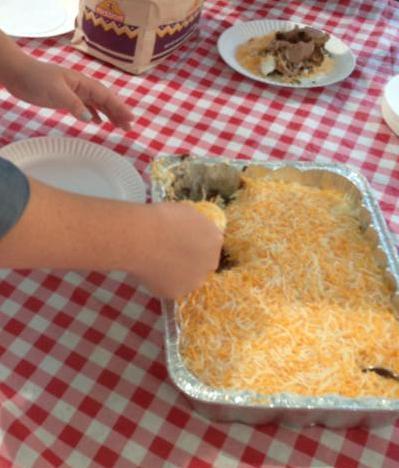
This recipe has some serious history behind it. It all started about 16 years ago. We had been invited to join my husband’s best friends family for a Fourth of July barbecue/swim party. It was a pot luck for a fairly large group so I thought the nine layer bean dip would work well as an appetizer. The dip was a hit and so began a Barton Family Bean Dip legacy. At first it was just 1 pan but then I found out a family member had an allergy to avocados so I added a small pan that had no guacamole in it. Soon the dip was disappearing as fast as I brought it out. Come to find out, people were skipping lunch just to eat the dip when we arrived.
Fast forward to the present. We now bring 3 varieties of the dip all weighing between 5 and 7 pounds each to all of our Memorial Day, Fourth of July and Labor Day gatherings. Three parties every year plus a couple of extra events thrown in by special request. That’s a lot of dip! One year we had to miss Memorial Day because Matthew was in the hospital. One family member jokingly asked, “Well, can you at least bring the dip?” Yeah. It’s that good!
Well, now it’s football season and the holiday season is quickly approaching. The next time you are invited to a party bring “the dip”. Word of caution, be prepared to be stopped at the door when you are invited back and you decide to bring something else!
3 cups of non-fried re-fried beans
2 cups diced green chiles
2 cups guacamole
1 cup taco seasoning
2 cups chopped olives
2 cups diced tomatoes
1 ½ cups chopped green onion
2 cups sour cream
2 cups shredded cheddar/Monterey Jack cheese
Guacamole directions: Peel, pit and mash 4-5 avocados. Mix in ¼ cup sour cream and salt, Cayenne pepper and black pepper to taste.
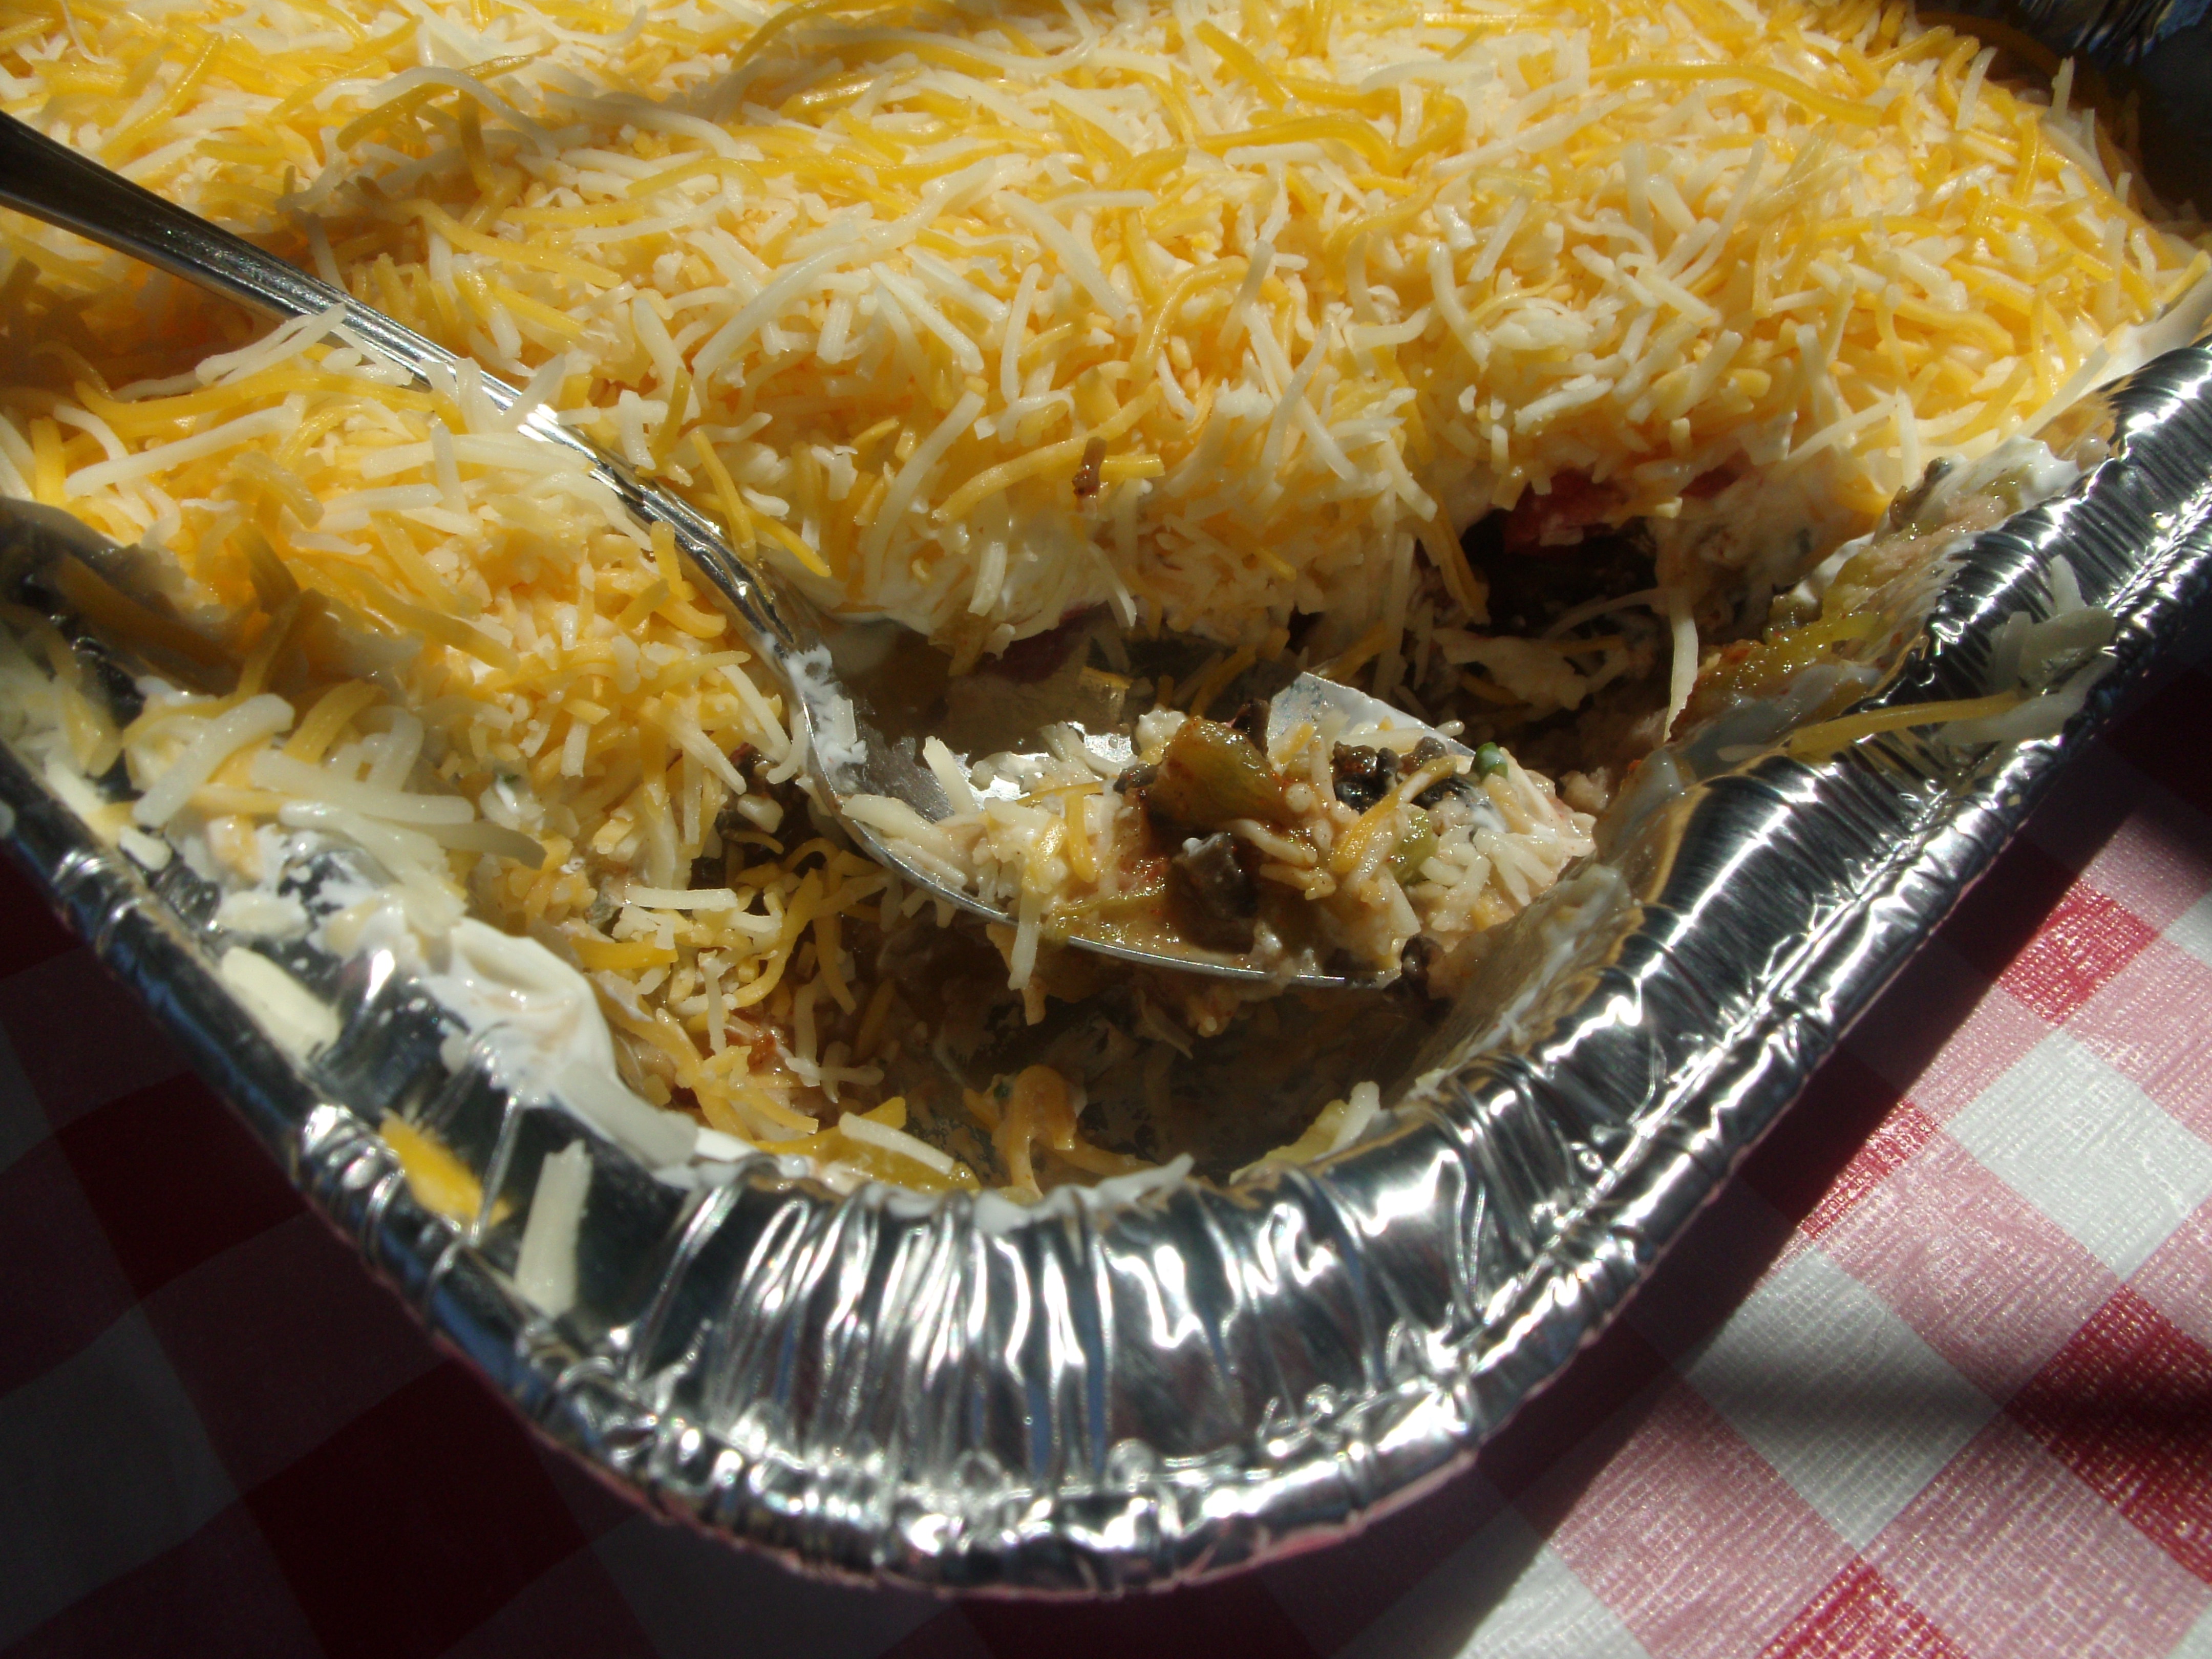
Dip directions: Layer each ingredient into a large lasagna pan (13-1/2 in. L x 9-5/8 in. W x 2-3/4 in. H) in the order listed. Chill in the refrigerator for at least 1 hour before serving.
Food Tip: For those allergic to avocado, eliminate that layer. For those who like a spicier dip, use chopped jalapenos in place of green chiles. This size dip is excellent for parties. If you want a smaller dip, choose the desired size pan and evenly layer all of the ingredients. The beans should measure about ¾ inch deep and each successive layer should completely cover the one below it.
Time Tip: The beans puree and spread much easier if they are freshly cooked and blended. Spread the non-fried re-fried beans into the pan, cover with foil and refrigerate overnight. Also chop the olives, tomatoes, green chiles and/or jalapenos the night before and store in airtight containers. It is best to chop the onions and make the guacamole the day the dip is to prepared and eaten.
Money Tip: When making this dip for a large group it is best to buy the ingredients at club stores or stores that specialize in catering. Making the non-fried re-fried beans fresh from beans purchased at a bulk food store is always more nutritional, less expensive and better tasting than canned.
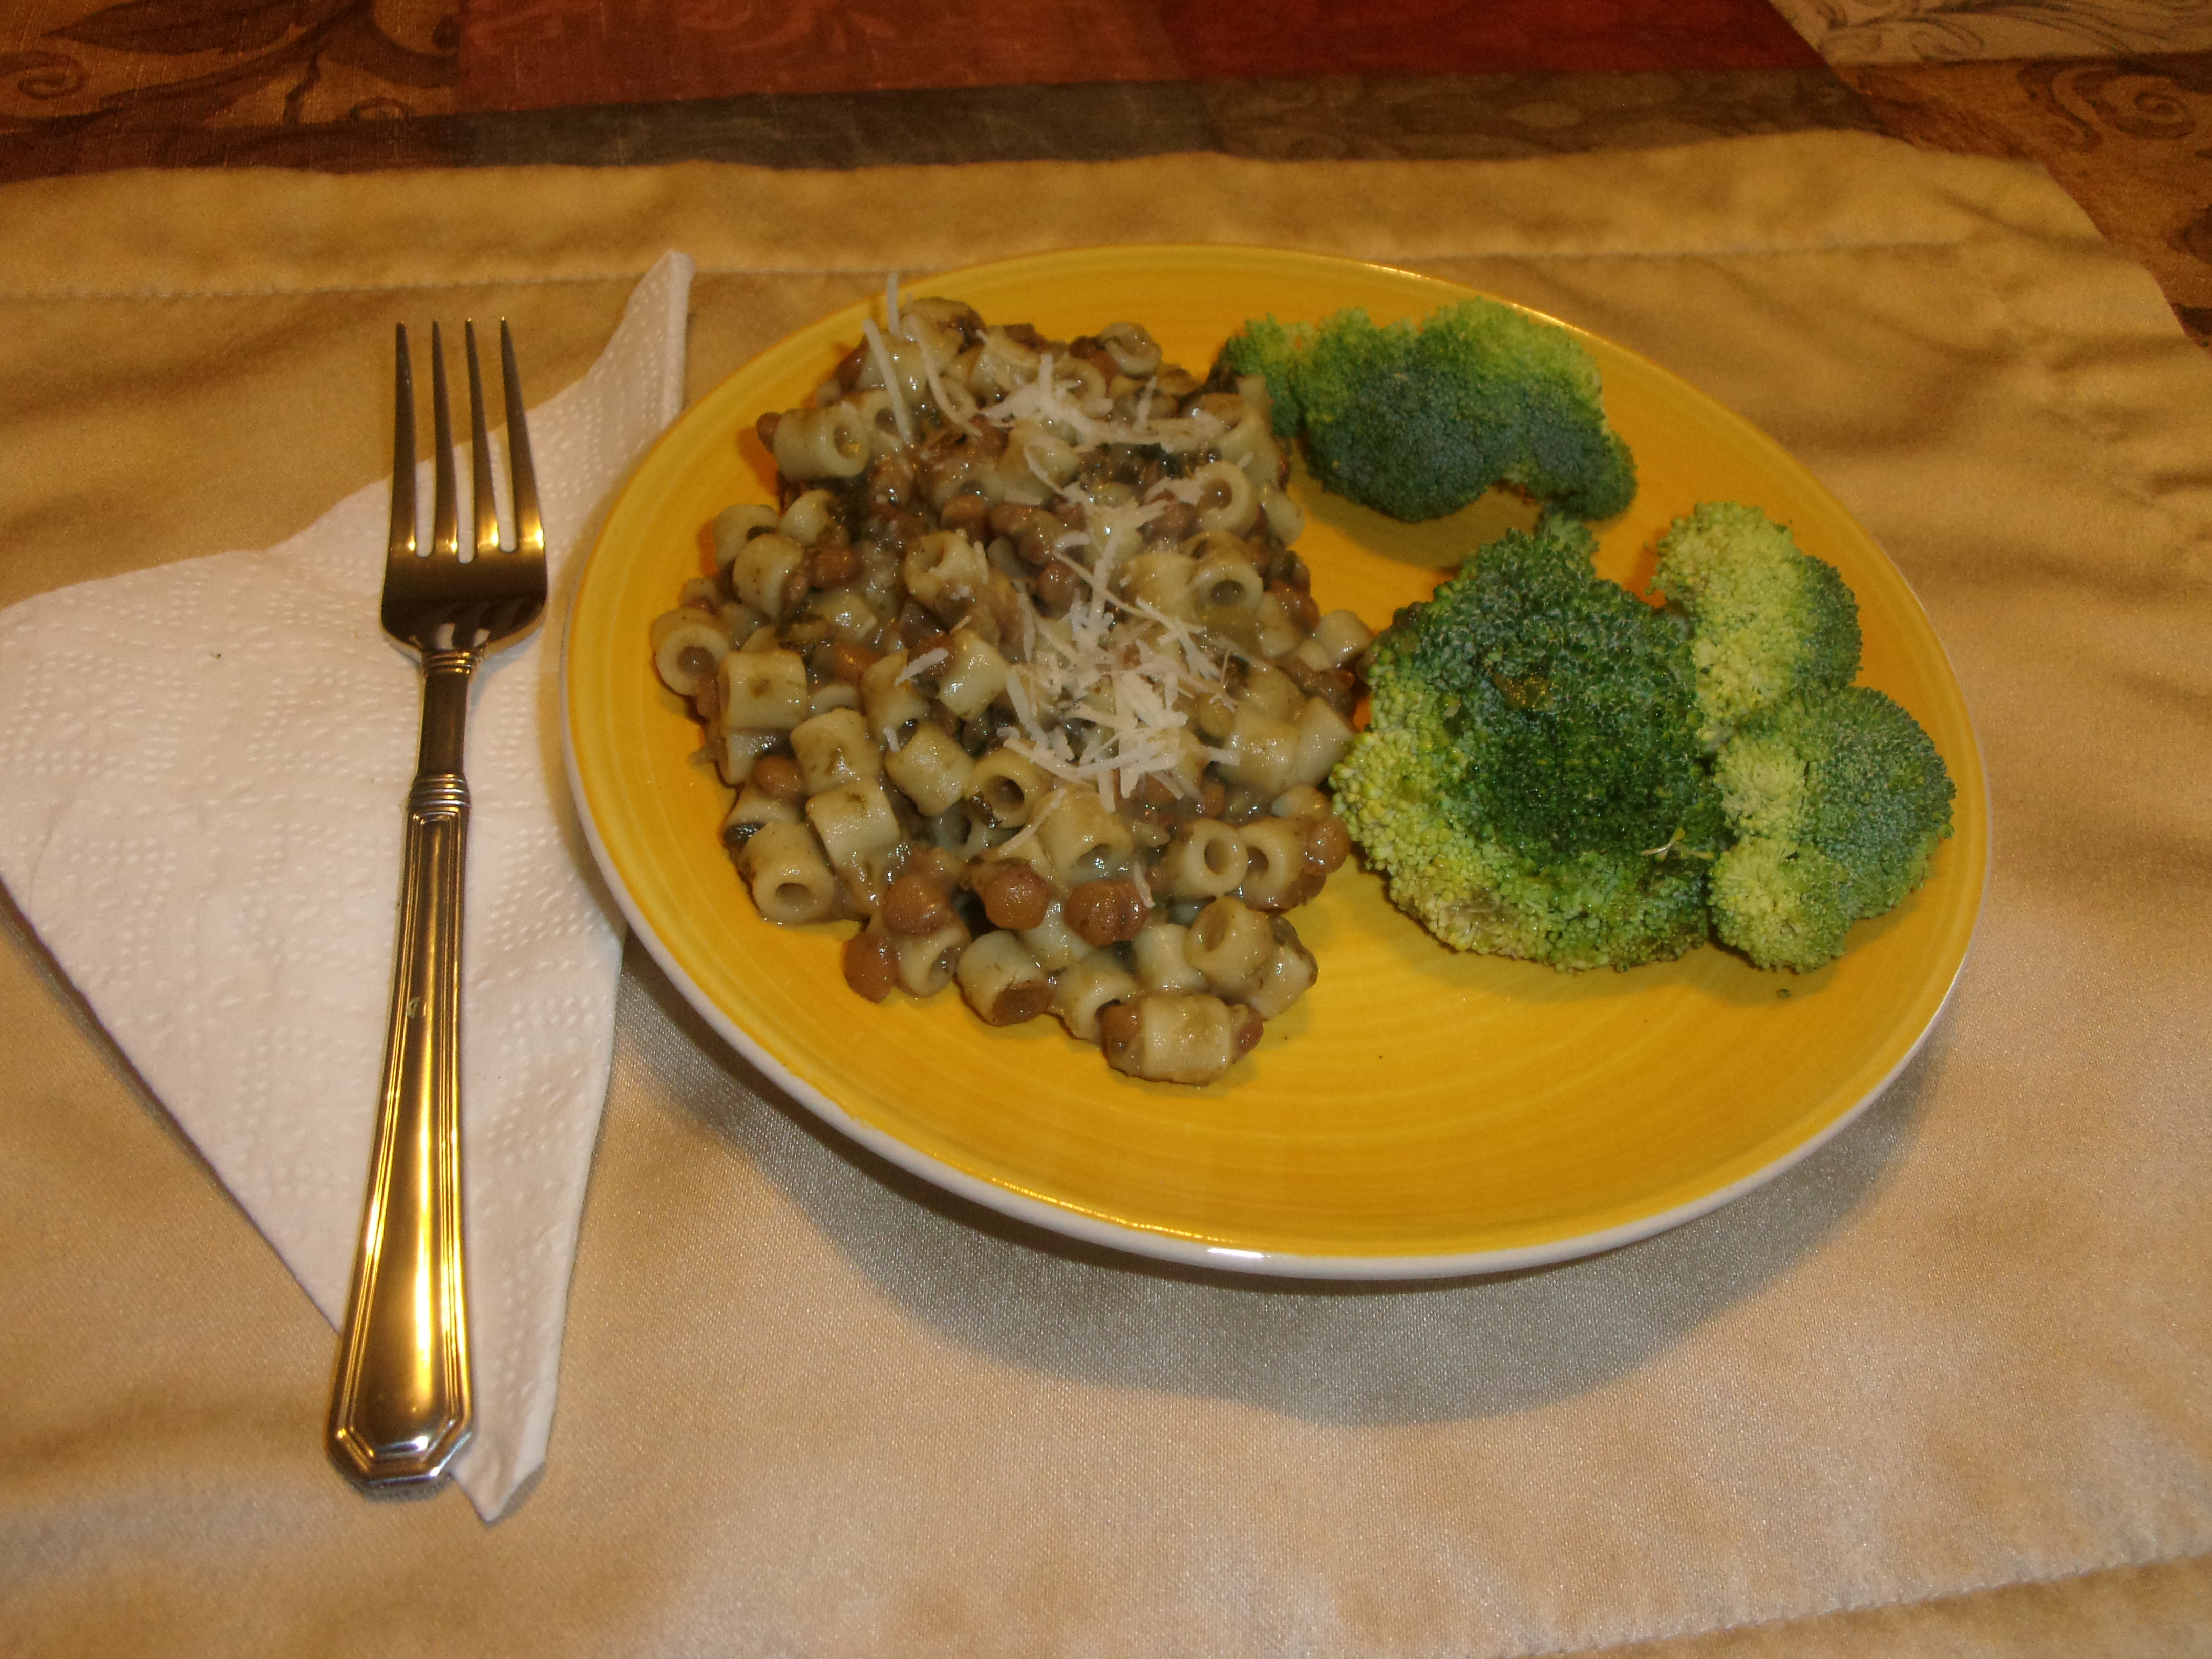
This recipe came from our dear friend, Gary Mirabella. As you can probably tell by his last name he’s Italian so, when he suggested I make this, I had no doubt it was going to taste amazing! And, as with every recipe he has shared with us, it was. So try this tonight for dinner and, for those of you with someone restricted to a pureed diet, don’t forget to save some to puree for them!
Pasta Lenticchie
1 19oz can of Progresso Lentil soup
1 tablespoon olive oil
1 clove of garlic minced
¼ cup diced onions
1 cup chopped fresh spinach
¼ grated Romano cheese
¼ cup grated Parmesan cheese
1 tsp Italian seasoning
1/8 tsp ground black pepper
8 oz macaroni salad pasta
Directions: In a medium sauce pan sauté the onions until they are translucent. Add in the spinach and garlic and continue to sauté until the spinach is wilted. Over medium heat, add soup, cheeses and seasonings. Stir to combine. When the mixture begins to bubble and the cheeses begin to melt, reduce heat to low and continue to cook stirring occasionally. Meanwhile, cook pasta according to the directions on the package. Drain and add to soup mixture. Top with a sprinkle of Romano and/or Parmesan cheese and serve with a side of fresh steamed vegetables.
Pureed Dinner
Place 1 cup of Pasta Lenticchie and 1 cup of vegetables into the Vitamix and secure lid.
Select Variable 1.
Turn machine on and increase to Variable 4.
Blend for 15-30 seconds using the tamper to press the ingredients into the blades. Increase speed and liquid as needed to reach the desired texture.
Food tip: When preparing dinners, make sure there are no food allergies to the ingredients. Using canned soup is fine but making your own ensures only the freshest ingredients go into it.
Time Tip: Double the recipe and puree the leftovers in the proportions listed above and freeze in ice cube trays covered in plastic wrap. Store in labeled and dated freezer bags.
Money Tip: Making your own soup from dried lentils saves money. Shop in markets that sell beans in bulk bags or bins. Store dried lentils in airtight bins in a cool dry place.
1 lb dried pinto beans
6 cups of water
2 tsp beef bouillon
Salt (to taste)
Quick soak- Place washed and sorted beans and the water into a 3 quart saucepan. Bring to a boil and cook for 10 minutes. Reduce heat to low for 1 hour. After 1 hour stir in the bouillon. Continue cooking the beans for 1-2 hours or until they are tender. Properly cooked beans should easily mash with the back of a spoon. Stir in salt to taste and let stand for 5 minutes. Drain the beans and reserve 1 cup of the broth.
Place 3 cups of drained beans into the Vitamix.
Select variable 1.
Turn machine on and quickly increase speed to Variable 10.
Blend for 30 seconds using the tamper to press the beans into the beans. Add small amounts of the bean broth to reach the desired consistency.
Repeat steps 1-3 until all the beans are pureed.
Food Tip: Use them as a side dish, to make burritos, tostadas or as a base for 9-layered dip. Add them to soups and stews as a natural thickener with the added benefit of adding extra protein.
Savings Tip: Because they are inexpensive, buy beans in bulk and store in a tightly sealed container in a cool, dry place. Under these conditions, dry beans can last up to a year. Also watch for sales in Mexican or farmer’s markets. These markets often have sales that are better than buying pre-packaged beans.
Time Tip: Cooked and pureed beans can keep for up to 6 months in the freezer. Double the recipe and freeze them in 1-3 cup size containers. When defrosted, use within 3 days. If using them as baby food, freeze them in standard ice cube trays covered in plastic wrap. Once frozen, put them into labeled and dated freezer bags for fast, fresh, individual portions.
All of my pureed diet recipes must pass a taste test. I feel, if I won’t eat it, why would anyone else? I sampled this recipe and it a tasted like an amped up Cream of Wheat. I had one of my girls taste it and she cleaned the plate!
1/3 cup of water
4 pancakes (or 4oz by weight)
Add ingredients the Vitamix container in the order listed and secure lid.
Select Variable 1.
Turn machine on and increase speed to Variable 10.
Blend for 10-15 seconds using the tamper to press the ingredients into the blades.
Food Tip: Serving this warm with maple syrup has all of the flavor of my whole grain pancakes minus the chewing. Increase or decrease the water 1 tablespoon at a time to reach the desired consistency.
Food Tip: If fiber needs to be restricted, use my whole grain pancake recipe but use ½ cup of oat flour, ½ cup quinoa flour and ½ cup of all purpose flour instead of the combination listed.
Money Tip: Of course you can use a prepared pancake mix or frozen pancakes but those will always more expensive.
Time Tip: As with all of my pureed recipes, any leftovers can be frozen in ice cube trays and stored in Ziploc bags for future use.
½ cup all purpose flour
½ cracked wheat or whole wheat flour
¼ cup oat flour
¼ cup quinoa flour
3 tablespoons sugar
2 tsp double-acting baking powder
1¼ cup of milk (any kind)
2 eggs
3 tablespoons melted butter
Combine dry ingredients in a medium size mixing bowl and set aside.
Combine eggs and milk in the Vitamix container and secure lid.
Select Variable1.
Turn machine on and blend for 3 seconds.
Turn machine off and remove lid.
Add in dry ingredients and secure lid.
Select Variable 1.
Increase speed to Variable 3 and blend for 10 seconds.
Turn off machine and remove lid.
Add the melted butter and secure lid.
Select Variable1.
Increase speed to Variable 3 and blend for 5 seconds.
Set the batter aside for 5 minutes to allow it to thicken (liquids take time to soak trough the brand of whole grains).
Pour batter directly from the Vitamix container onto an electric griddle preheated to 350 degrees or a standard griddle over a medium to medium high heat.
Food Tip: The combination of flours makes these pancakes light and full of flavor. Maple syrup adds the finishing touch but you won’t want to use much. They are also great straight out of the toaster plain. The whole grain flours are a great source of fiber and protein.
Money Tip: Homemade pancakes take a little more time and effort than pre-made batters but they are far less expensive (not to mention they taste so much better). Frozen prepackaged pancakes may be a quick grab but they are even more expensive than the pre-made batters (Again, taste is an issue).
Time Tip: Pre-grind a portion of your whole grains into flour and keep on hand for quick addition/substitution to your favorite recipes. Making these pancakes with a mixer takes a lot longer and pouring directly from the Vitamix container saves time on clean up. Keep the leftovers (if there are any) in a Ziploc bag in the refrigerator. They will stay fresh for 3-5 days but trust me, they will not last that long. You can also double the recipe and freeze the extras in stacks of 4 in a Ziploc Freezer bag.
Nothing matches the flavor and nutritional value of homemade baked goods made from fresh ground flours. No need to purchase a flour mill if you have a Vitamix. The time it takes to grind grain into very fine flour is unbelievably fast!
½ -2 cups of whole grain (wheat berries, steel cut oats, rice, quinoa, millet,barley, cornmeal)
Steel Cut Oats
Place the grain into the Vitamix container and secure lid.
Select Variable 1.
Turn Machine on and quickly increase speed to Variable 10, then High.
Blend for 1 minute.
Food Tip: Any whole grain can be turned into flour. The standard wet blade Vitamix container will grind grain but, for best results, use the specialized dry blade container. It can be purchased separately but it comes with the Complete Kitchen package. Whole grains produce a small amount of moisture while grinding. To keep your flour from caking, leave the lid off of your air-tight storage container until the flour is completely cooled so that the moisture evaporates and does not get trapped inside.
Money Tip: Buying whole grains in a bulk food store saves a lot of money. The price per pound is always lower than pre-packaged. Depending on how often you use them, buy 1-3 pounds and store them in an air tight container. Unlike bleached all purpose flour, whole grains still have their natural oils. To keep them fresher longer and avoid waste, they should be stored in the refrigerator or freezer.
Time Tip: Pre grind a portion of your whole grains into flour and keep on hand for quick addition/substitution to your favorite recipes.
Here in southern California the summer heat is just beginning to ramp up. With temperatures that hover near 100 degrees sometimes into October, staying cool and hydrated is high on our list of priorities. My husband came across this recipe on Foodwishes.com and asked me if I could make it. I just happened to have half a watermelon in the refrigerator so my answer was, “Absolutely!” I researched the heath benefits of watermelon and was surprised at what I found:
Despite popular belief that watermelon is made up of only water and sugar, watermelon is actually considered a nutrient dense food, a food that provides a high amount of vitamins, minerals and antioxidants for a low amount of calories. Watermelons have become synonymous with summer and picnics, and for good reason. Their refreshing quality and sweet taste help to combat the heat and also provide a guilt-free, low maintenance dessert for kids and adults alike to enjoy. Along with cantaloupe and honeydew, watermelons are a member of the botanical family Cucurbitaceae. There are five common types of watermelon: seeded, seedless, mini (also known as personal), yellow and orange. This MNT Knowledge Center feature is part of a collection of articles on the health benefits of popular foods. It provides a nutritional breakdown of watermelon and an in-depth look at its possible health benefits, how to incorporate more watermelon into your diet and any potential health risks of consuming watermelon. Nutritional breakdown of watermelon
Along with cantaloupe and honeydew, watermelons are a member of the botanical family Cucurbitaceae. One cup of diced watermelon (152 grams) contains 43 calories, 0 grams of fat, 2 grams of sodium, 11 grams of carbohydrate (including 9 grams of sugar and 1 gram of fiber) and 1 gram of fiber. One cup of watermelon will provide 17% of vitamin A, 21% of vitamin C, 2% of iron and 1% of calcium needs for the day. Watermelon also contains thiamin, riboflavin, niacin, vitamin B-6, folate, pantothenic acid, magnesium, phosphorus, potassium, zinc, copper, manganese, selenium, choline, lycopene and betaine. According to the National Watermelon Promotion Board, watermelon contains more lycopene than any other fruit or vegetable. Despite being a great source of the above nutrients, watermelon is made up of 92% water. (Excerpt taken from Medical News Today. Originally published: Sunday 10/6/13)
Watermelon Agua Fresca
6 cups fresh scooped or chopped watermelon
2 cups cold water
Simple syrup or other sweetener to taste (optional)
1. Place watermelon and water into the large Vitamix container and secure lid.
2. Select Variable 1.
3. Turn machine on and increase speed to Variable 10, then High.
4. Blend for 30 seconds.
No straining needed
Food Tip: This recipe makes 2 quarts but it can but cut in half and made in the smaller container. Unlike with a standard blender, there is no need to strain out the fibers from the watermelon seeds. The Vitamix blends so completely that, not only are there no fibers, there is very little recognizable pulp when you drink it. Watermelons are typically at their peak of sweetness between June and August so, unless you have a serious sweet tooth, there is no need to add any sweetener. Don’t like watermelon? Try the same recipe with cantaloupe. It is just as refreshing!
Cantaloupe Agua Fresca
Money Tip: As with any fruit, buying watermelon in season is always cheaper especially if you buy them at a farmer’s market. I recently purchased a 25 pound watermelon on sale for just over $3.
Time Tip: The original recipe used a standard blender that required 1 minute of blending. When made in the Vitamix it took 30 seconds and there was no time spent on straining.
So what do you serve for dessert when it’s 102 degrees outside? Ice cream, of course! This is a fresh and fruity twist on an old time favorite. My husband likes his with a sprinkle of shredded coconut while my girls prefer it without the banana. With the Vitamix I can make 2 servings at a time in less than a minute so everyone gets exactly what they want!
1. Place all ingredients into the Vitamix container in the order listed and secure lid.
2. Select Variable 1.
3. Turn machine on and quickly increase to Variable 10, then High.
4. Use Tamper to press ingredients into the blades.
5. In about 30-60 seconds, the sound of the motor will change and four mounds should form.
6. Stop machine. Do not over mix or melting will occur. Serve immediately.
Food Tip: I have found that using frozen pureed cottage cheese cubes makes for a smoother ice cream that is higher in calcium and lower in fat than using half n half or heavy cream. This recipe is very versatile. Try mixing and matching any frozen fruit and “milks” you have to create your own healthy fruit “ice cream”.
Money tip: Buying a 3pound container of cottage cheese may seem like over kill but I use it to replace almost all of the milk products in my recipes. At Costco it only costs $4.99 whereas the 16oz container can cost $2.50 in the grocery store. After the larger container is opened it will keep for 5-7 days. Freezing a portion when it is opened will ensure freshness and minimize waste.
Time tip: Using Frozen fruit and cottage cheese cubes takes the guess work out of balancing flavor and texture. Preparation time is shorter because there is no need to measure anything. Also you won’t have to spend extra time making the ice cream trying to break down cottage cheese curds.